Replace the lettering on an invitation
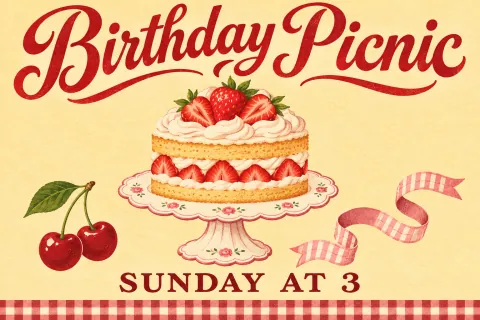
Keep the strawberry cake and cherries for the next party. Leave out the old lettering when you rebuild the invitation, then add the new name, date or venue in a text box.
Turn a flat image into a background and separate transparent PNGs. Lift the lettering from an invitation or move a product into a new layout.
Explore this three-part poster mockup. Isolate the paper, the painted owl or the title to see what you could move or replace in a layout.

Keep the strawberry cake and cherries for the next party. Leave out the old lettering when you rebuild the invitation, then add the new name, date or venue in a text box.
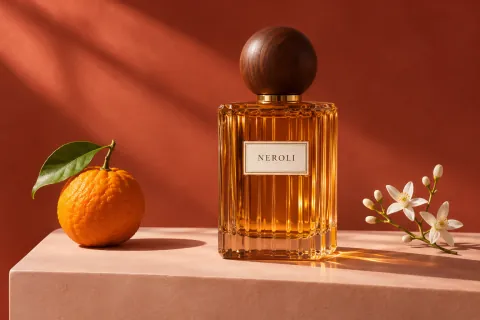
Download the bottle layer and place it on a new color or photograph. Inspect the cap, outline and contact shadow against the new surface before exporting the ad.

For a tall book cover, keep the illustrated character in the foreground and extend the backdrop in your editor. Move the character down to leave clear space for the title.
Use the largest clean copy of your poster or product graphic. Crop out screenshots of menus and frames so the split concentrates on the design.
Allow one image for the background, then count the pieces you want to move independently. A background, a product and a headline need room for at least three outputs.
Open the saved split and look for each subject on the checkerboard preview. Download the background and the foreground pieces you plan to use. Each download gives you one image.
Open the downloaded background at its original dimensions. Place the PNGs above it in layer order. Start with the original canvas size so any placement coordinates line up before you resize the finished composition.
When a layer shows bounds, the four numbers are its left, top, right and bottom edges in pixels. For example, bounds of 100, 80, 500, 380 mean a 400 × 300 px layer placed 100 px from the left and 80 px from the top. If bounds are unavailable, use the source image as an alignment guide.
Start with a small limit for a simple design. Choose 2K when you need more detail in a logo or lettering. Each price includes one source image and the selected output limit.
View credit plans| Output limit | 1K | 1.5K | 2K |
|---|---|---|---|
| 2 images | 10 | 10 | 16 |
| 4 images | 18 | 18 | 29 |
| 8 images | 33 | 33 | 57 |
Yes. Upload the flattened JPG, PNG, WebP or GIF. The model estimates which elements belong together. Where an object covers part of the background, the split may reconstruct that area.
A lettering PNG preserves the appearance of the original words. To change them, leave that PNG out and add a text box in your editor. When recognized text appears below the preview, you can copy it as a starting point.
The downloads are individual PNG files. Import the background into Photoshop or another layer-based editor, then place the foreground PNGs above it.
The limit gives the model room to separate elements. Closely connected details may stay together in one layer. A completed split costs the amount shown when you submitted it.
Starting with an idea or a product photo? Create your source artwork with the Seedream 5.5 image generator.